Showing posts with label Blogger Widgets. Show all posts

Monday, February 10, 2014

How to Add Adsense Ads In the Middle or Anywhere inside Blogger Posts

In a previous post we saw how and where we can place Adsense ads on our blog; however, these methods would only work when we place the ads on predetermined and fixed locations. For posts area, the most common places are below the title, at the beginning of the post or at the end of the post.

But what if we want to display an AdSense ad in the middle of a post?

We can manipulate the location of the ads to be displayed by adding a script inside the template, then using a label inside our post to where we want the AdSense ad to appear. Once added, we can place the ads anywhere, be it between paragraphs or in the middle of the content etc.
Manually inserting Adsense ads in the middle of posts in Blogger is pretty simple, just follow these steps below:

Before proceeding, it is recommended do backup your template (go to Template > click on the Backup/restore button)

Step 1. First thing we need to do is to "parse" the AdSense code, in other words, convert it to plain text. Then go to Template, click on the Edit HTML button, click anywhere inside the code area and look for this tag (CTRL + F):
<data:post.body/>
Note: you may find it several times, but we need to stop at the second one or if you can't see any changes, test the third one

Screenshot
Step 2. Replace the <data:post.body/> tag with this code:
<div expr:id='"adsmiddle1" + data:post.id'></div>
<div style="clear:both; margin:10px 0">
<!-- Add here the code of your ad -->
</div>
<div expr:id='"adsmiddle2" + data:post.id'>
<data:post.body/>
</div>
<script type="text/javascript">
var obj0=document.getElementById("adsmiddle1<data:post.id/>");
var obj1=document.getElementById("adsmiddle2<data:post.id/>");
var s=obj1.innerHTML;
var r=s.search(/\x3C!-- adsense --\x3E/igm);
if(r>0) {obj0.innerHTML=s.substr(0,r);obj1.innerHTML=s.substr(r+16);}
</script>
Step 3. Put the converted Adsense code to where you see the <!-- Add here the code of your ad --> annotation, then save the changes by clicking on the Save template button

Step 4. When you create a New Post, add this tag inside the HTML section in the exact location where you want the Google AdSense ads to appear:
<!-- adsense -->
For example:
<div>This is a demo text. This is a demo text. This is a demo text. This is a demo text. This is a demo text. This is a demo text. This is a demo text. This is a demo text. This is a demo text. This is a demo text.</div>
<!-- adsense --><div>This is a demo text. This is a demo text. This is a demo text. This is a demo text. This is a demo text. This is a demo text. This is a demo text. This is a demo text. This is a demo text. This is a demo text.</div>

Screenshot
Note: If you don't add the label to bring up the ad then the ad appears below the title by default.

This method doesn't violate Google's Terms of Service because you are not changing the structure of the ad.
Read more ...

Recent Rotating Post Gadget with Excerpt For Blogger

This Javascript code will display the latest posts of any feed with the distinction of having two parts that can be used individually or combined. At the top this widget will show a single post along with the title (link), author, date and a brief summary of its content. In addition, this post will rotate automatically within a list whose number of elements will be decided by us. At the bottom, we'll find a full list with chosen posts that will change the post above when we mouse over them, thus breaking the automatic cycle.
Before installing anything, let's see it in action to decide if it does what we want.


Loading...

How to Add Recent Rotating Posts Widget to Blogger


Step 1. Go to Layout > click on Add a Gadget link.


Step 2. From the pop-up windows, choose the HTML/Javascript gadget


Step 3. Paste this code inside the empty box:
<style>
.gfg-root {
width: 100%;
height : auto;
position : relative;
overflow : hidden;
margin: 0 auto;
text-align : center;
font-size: 12px;
border: 1px solid #DBDBDB;
}
.gfg-title {
font-size: 16px;
font-weight : bold;
color : #6B6B6B;
background:#F3F3F3;
background-repeat: repeat;
line-height : 1.4em;
overflow : hidden;
white-space : nowrap;
padding: 5px;
text-shadow: 0px 2px #fff;
}
.gfg-entry {
background-color: #FFFFFF;
width : 100%;
height : 9.2em;
position : relative;
overflow : hidden;
text-align : left;
margin-top : 3px;
}
.gf-title a {
text-transform: capitalize;
color: #0000ff;
font-size: 14px;
}
.gfg-subtitle {
display: none;
}
.gfg-list {
position : relative;
overflow : hidden;
text-align : left;
}
.gfg-listentry {
line-height : 1.5em;
overflow : hidden;
white-space : nowrap;
text-overflow : ellipsis;
padding-left : 15px;
padding-right : 5px;
}
.gfg-listentry-odd {
background-color : #F3F3F3;
border-bottom : 1px dotted #CCCCCC;
padding: 5px;
}
.gfg-listentry-even {
background-color : #F3F3F3;
border-bottom : 1px dotted #CCCCCC;
padding: 5px;
}
.gfg-listentry-odd a{
color: #595959;
padding: 0 0px 0 10px;
}
.gfg-listentry-even a{
color: #242424;
padding: 0 0px 0 10px;
}
.gfg-listentry-highlight {
background: #FFFFFF;
}
.gfg-listentry-highlight:before {
position: absolute;
left: 0;
content: '\25BA ';
font-size: 14px;
color: #DBDBDB;
}
.gfg-listentry-highlight a {
color: #242424;
}
.gfg-root .gfg-entry .gf-result {
position : relative;
background-color: #ffffff;
width : auto;
height : 100%;
padding-left : 20px;
padding-right : 5px;
}
.gfg-root .gfg-entry .gf-result .gf-title {
font-size: 14px;
line-height : 1.2em;
overflow : hidden;
white-space : nowrap;
text-overflow : ellipsis;
margin-bottom : 2px;
margin-top: 5px;
}
.gfg-root .gfg-entry .gf-result .gf-snippet {
height : 3.8em;
color: #000000;
margin-top : 3px;
}
.clearFloat {
clear : both;}</style>
<script src="http://www.google.com/jsapi" type="text/javascript"></script><script src="http://www.google.com/uds/solutions/dynamicfeed/gfdynamicfeedcontrol.js" type="text/javascript"></script>
<script type="text/javascript">
function showGadget() {var feeds = [{title:'List',url:'http://helplogger.blogspot.com/feeds/posts/default?redirect=false&start-index=1&max-results=10'},];
new GFdynamicFeedControl(feeds, 'feedGadget',{title: 'Latest Posts', numResults : 10, displayTime : 5000, hoverTime : 500});} google.load("feeds", "1");
google.setOnLoadCallback(showGadget);
</script>
<div id="feedGadget">Loading...</div>

Customizations:

The url in blue is the feed address. Obviously, the http://helplogger.blogspot.com address should be replaced with yours.

Next is start-index=1. This number indicates which post will appear first on the list. By default it is the latest post published on our blog, so if we want to begin displaying older posts, we need to change the 1 value.

max-results=10 indicates the maximum number of posts that we will be reading from the feed, beginning from the one that we have set up before in the start-index=1. This number always needs to be equal or greater to what we should see later and its purpose is to set the number of posts that will be shown in the gadget. The easy thing would be to put 500 in order not to fail, but the higher the number is, the longer the gadget will take to load, so it's better to adjust to what we need to show.

Finally here are some other parameters of the script:

title: 'Latest Posts', is the widget's title that appears on top.
numResults: 10, number of posts that will show in the list
displayTime: 5000, the delay time between posts in the rotator (in milliseconds)
hoverTime: 500, minimum time for an item in the list to be displayed at the top.

If you want to hide the list and show only the posts, then change this part:
.gfg-list {
position : relative;
overflow : hidden;
text-align : left;
}
 to :
.gfg-list {
display:none;
}
and if you want to display only the list, then change this part:
.gfg-entry {
background-color: #FFFFFF;
width : 100%;
height : 9.2em;
position : relative;
overflow : hidden;
text-align : left;
margin-top : 3px;
}
to:
.gfg-entry {
display: none; }

Step 4. Save the gadget and you're done. Enjoy!
Read more ...

Top Commentators Widget with Avatars for Blogger

 
The commentators are a fundamental part of any blog, since they are the ones that give life to the blog, opening and replying to discussions which leads to more activity in the posts.

It is therefore very important to know which are the most active users of your blog, the users who leave more comments, and for this reason, today I present a great method to display a list with the top commentators.

The gadget will look something like this:

add top commentators widget to blogger

This Top Commentators gadget comes with user's avatar and is done with JavaScript.

How to Add the Top Commenters Gadget to Blogger


1. To add this gadget, you have to go to Layout, click on Add a Gadget link.

2. Select the HTML/JavaScript gadget and copy/paste within the empty box the following code:
<style type="text/css">
.top-commentators {
margin: 3px 0;
border-bottom: 1px dotted #ccc;
}
.avatar-top-commentators {
vertical-align:middle;
border-radius: 30px;
}
.top-commentators .commenter-link-name {
padding-left:0;
}
</style>
<script type="text/javascript">
var maxTopCommenters = 8; 
var minComments = 1;    
var numDays = 0;        
var excludeMe = true;   
var excludeUsers = ["Anonymous", "someotherusertoexclude"];
var maxUserNameLength = 42;
//
var txtTopLine = '<b>[#].</b> [image] [user] ([count])';
var txtNoTopCommenters = 'No top commentators at this time.';
var txtAnonymous = '';
//
var sizeAvatar = 33;
var cropAvatar = true;
//
var urlNoAvatar = "https://blogger.googleusercontent.com/img/b/R29vZ2xl/AVvXsEj69_JfKeIoOWGIoO3K8UfbasGfBFlA9aOjWG76B01mWOK_HDOy-grrfx4vR-8pciPu3JPU0N1XfX0sPN05_E-y8HnpOUqWH0Vy1PN35gxxw8SDjNjIbZ-sMOgPvrWpcqJUxpfy-GV-FTKS/s1600/avatar_blue_m_96.png" + sizeAvatar;
var urlAnoAvatar = 'https://blogger.googleusercontent.com/img/b/R29vZ2xl/AVvXsEiEvsCGZduD0gTXtKom_7v7w9n0nSQslHwQmECWeveVXVBZN2WqUeR8H0ECj-MLU0LTrwWMyr3v7CBPPtpNT3-2PYjURin79dX0wKxgE8vneluv-8oYVvPAkNsRcYk1_rfjNeZYgsHJPqIz/s1600/avatar1.png' + sizeAvatar;
var urlMyProfile = '';
var urlMyAvatar = '';
if(!Array.indexOf) {
 Array.prototype.indexOf=function(obj) {
  for(var i=0;i<this.length;i++) if(this[i]==obj) return i;
  return -1;
}}
function replaceTopCmtVars(text, item, position)
{
  if(!item || !item.author) return text;
  var author = item.author;
  var authorUri = "";
  if(author.uri && author.uri.$t != "")
    authorUri = author.uri.$t;
  var avaimg = urlAnoAvatar;
  var bloggerprofile = "http://www.blogger.com/profile/";
  if(author.gd$image && author.gd$image.src && authorUri.substr(0,bloggerprofile.length) == bloggerprofile)
    avaimg = author.gd$image.src;
  else {
    var parseurl = document.createElement('a');
    if(authorUri != "") {
      parseurl.href = authorUri;
      avaimg = 'http://www.google.com/s2/favicons?domain=' + parseurl.hostname;
    }
  }
  if(urlMyProfile != "" && authorUri == urlMyProfile && urlMyAvatar != "")
    avaimg = urlMyAvatar;
  if(avaimg == "http://img2.blogblog.com/img/b16-rounded.gif" && urlNoAvatar != "")
    avaimg = urlNoAvatar;
  var newsize="s"+sizeAvatar;
  avaimg = avaimg.replace(/\/s\d\d+-c\//, "/"+newsize+"-c/");
  if(cropAvatar) newsize+="-c";
  avaimg = avaimg.replace(/\/s\d\d+(-c){0,1}\//, "/"+newsize+"/");
  var authorName = author.name.$t;
  if(authorName == 'Anonymous' && txtAnonymous != '' && avaimg == urlAnoAvatar)
    authorName = txtAnonymous;
  var imgcode = '<img class="avatar-top-commentators" height="'+sizeAvatar+'" width="'+sizeAvatar+'" title="'+authorName+'" src="'+avaimg+'" />';
  if(authorUri!="") imgcode = '<a href="'+authorUri+'">'+imgcode+'</a>';
  if(maxUserNameLength > 3 && authorName.length > maxUserNameLength)
    authorName = authorName.substr(0, maxUserNameLength-3) + "...";
  var authorcode = authorName;
  if(authorUri!="") authorcode = '<a class="commenter-link-name" href="'+authorUri+'">'+authorcode+'</a>';
  text = text.replace('[user]', authorcode);
  text = text.replace('[image]', imgcode);
  text = text.replace('[#]', position);
  text = text.replace('[count]', item.count);
  return text;
}
var topcommenters = {};
var ndxbase = 1;
function showTopCommenters(json) {
  var one_day=1000*60*60*24;
  var today = new Date();
  if(urlMyProfile == "") {
    var elements = document.getElementsByTagName("*");
    var expr = /(^| )profile-link( |$)/;
    for(var i=0 ; i<elements.length ; i++)
      if(expr.test(elements[i].className)) {
        urlMyProfile = elements[i].href;
        break;
      }
  }
  if(json && json.feed && json.feed.entry && json.feed.entry.length) for(var i = 0 ; i < json.feed.entry.length ; i++ ) {
    var entry = json.feed.entry[i];
    if(numDays > 0) {
      var datePart = entry.published.$t.match(/\d+/g);
      var cmtDate = new Date(datePart[0],datePart[1]-1,datePart[2],datePart[3],datePart[4],datePart[5]);
  
      var days = Math.ceil((today.getTime()-cmtDate.getTime())/(one_day));
      if(days > numDays) break;
    }
    var authorUri = "";
    if(entry.author[0].uri && entry.author[0].uri.$t != "")
      authorUri = entry.author[0].uri.$t;
    if(excludeMe && authorUri != "" && authorUri == urlMyProfile)
      continue;
    var authorName = entry.author[0].name.$t;
    if(excludeUsers.indexOf(authorName) != -1)
      continue;
    var hash=entry.author[0].name.$t + "-" + authorUri;
    if(topcommenters[hash])
      topcommenters[hash].count++;
    else {
      var commenter = new Object();
      commenter.author = entry.author[0];
      commenter.count = 1;
      topcommenters[hash] = commenter;
    }
  }
  if(json && json.feed && json.feed.entry && json.feed.entry.length && json.feed.entry.length == 200) {
    ndxbase += 200;
    document.write('<script type="text/javascript" src="http://'+window.location.hostname+'/feeds/comments/default?redirect=false&max-results=200&start-index='+ndxbase+'&alt=json-in-script&callback=showTopCommenters"></'+'script>');
    return;
  }
  // convert object to array of tuples
  var tuplear = [];
  for(var key in topcommenters) tuplear.push([key, topcommenters[key]]);
  tuplear.sort(function(a, b) {
    if(b[1].count-a[1].count)
        return b[1].count-a[1].count;
    return (a[1].author.name.$t.toLowerCase() < b[1].author.name.$t.toLowerCase()) ? -1 : 1;
  });
  var realcount = 0;
  for(var i = 0; i < maxTopCommenters && i < tuplear.length ; i++) {
    var item = tuplear[i][1];
    if(item.count < minComments)
        break;
    document.write('<di'+'v class="top-commentators">');
    document.write(replaceTopCmtVars(txtTopLine, item, realcount+1));
    document.write('</d'+'iv>');
    realcount++;
  }
  if(!realcount)
    document.write(txtNoTopCommenters);
}
document.write('<script type="text/javascript" src="http://'+window.location.hostname+'/feeds/comments/default?redirect=false&max-results=200&alt=json-in-script&callback=showTopCommenters"></'+'script>');
</script>
3. Now you just have to save changes and you're done!

Configuration

- To modify the number of users displayed in the gadget, look for var maxTopCommenters = 8; and change 8 with any number you want.
- To change the avatar size of the commenters, look for var sizeAvatar = 33; and change number 33 with the number of pixels you want.
- To hide your name or some other username, replace the someotherusertoexclude text between the quotes (to add more, add another comma after the text in red, then type the username you want to exclude between the quotes)
Read more ...

How to Add a Recent Forum Topics Widget to Blogger


If you are using the Nabble forum in your blog is very likely that this gadget will interest you because, as the title suggests, it will display the lastest topics that have been published in your forum in a very similar manner to the recent comments gadget that works with the blog's feed.

If you want to add a list with the Recent Forum Topics then follow the steps below:

Go to your forum and look at the bottom where it says Feeds, click on that link and then two links of the Feed will appear (the first being the Topics only Feed and the other one is Topics and replies) - choose the one you want.

using nabble feeds to see latest forum topics

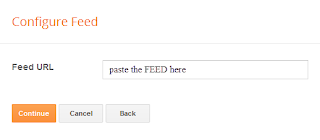
After this, log in to your Blogger Dashboard, go to Layout, click on Add a Gadget link, choose Feed from the gadgets list and paste the Feed URL you have selected inside the text box.

configure gadget feed in blogger

Click on Continue, and you only have to configure the parameters, then Save changes to see the results.

That's it! Enjoy :)
Read more ...

4 Different Styles For the Popular Posts Widget

Blogger allows us to easily add a "Popular Posts" widget, that we select from its list of gadgets, and we can do that by going to the "Layout" of our Blog.

This gadget, as the name implies, shows which are the most visited blog posts, and you can set it to display the info you want in four possible combinations: (1) only the title of the post, (2) a thumbnail of the image and the post title, (3) post title with a summary, and (4) post title with a thumbnail and a post snippet.

This is an element that you shouldn't miss in your blog because it encourages your visitors to navigate through your content and that can result in higher income if you're monetizing your blog because it would generate an increase in the number of pages visited, and in turn, can attract the users' interest to subscribe to the blog and to read interesting content.

Preliminary steps: Add the gadget, if you haven't done it yet.


1. Select the "Layout" tab and add the "Popular Posts" gadget in that part of your blog you want to appear, such as in your sidebar, by clicking on "Add a Gadget".

2. Configure the widget to show only the post titles. You can do this by clicking on the "image thumbnail" and "snippet" checkboxes, as shown in the following image.

3. After configuring the widget, save the changes by clicking on Save, and then Save arrangement.

How to add the CSS to create the style of the Popular Posts widget


1. Choose a style, then copy the CSS that appears below the image that shows the style.

2. Select the "Template" tab, then click on Customize > Advanced > Add CSS and then paste the CSS style that you like the most.

blogger tutorials
3. Once you add the CSS, Save changes by clicking on the "Apply to Blog" button.

Note: Some Blogger templates might not allow adding CSS in that location. In that case, for adding the CSS style you need to access the Template's HTML - from your Blogger Dashboard, go to Template > Edit HTML and paste the code just above the ]]></b:skin> tag (press the CTRL + F keys to find it - you might need to click on the arrow to expand the code and after that search it again)

And that's it! You've already customized the popular posts widget when it shows only post titles.

Styles

Here is the CSS of each style, just choose the one you like the best and put it on your blog. You can see each of these styles in action in the following demo blog:

http://demo-blog343.blogspot.com

Style 1:
blogger gadgets, blogger widgets, popular posts widget
#PopularPosts1 h2{
padding:7px 0 3px 0;
width:100%;
margin-bottom:10px;
font-size:1.3em;
text-indent:-12px;
font-size:18px;
text-align:center;
color: #757575; /* Color of the widget's title */
}
#PopularPosts1 ul{
list-style:none;
counter-reset:li;
padding:8px 0px 1px;
left:-7px;
width:290px;
}
#PopularPosts1 li{
position:relative;
margin:0 0 10px 0;
padding: 3px 2px 0 17px;
left:-5px;
width:285px;
}
#PopularPosts1 ul li{
background: #eee;
position: relative;
display: block;
padding: .4em .2em .4em 2em;
*padding: .2em;
margin: .5em 0;
background: #ddd;
text-decoration: none;
border-radius: .3em;
transition: all .3s ease-out;  
}
#PopularPosts1 ul li:before{
content: counter(li);
counter-increment: li;
position: absolute;
top: 50%;
margin: -1.3em;
height: 2em;
width: 2em;
line-height: 2em;
font-size: 15px;
color: #fff; /* text color of numbers */
background: #FB8835; /* background color of numbers */
border: .2em solid #fff; /* border color */
-webkit-box-shadow: 0 8px 5px -7px #888;
-moz-box-shadow: 0 8px 5px -7px #888;
box-shadow: 0 8px 5px -7px #888;
text-align: center;
font-weight: bold;
border-radius: 2em;
position: absolute;  
left: 0;
transition: all .3s ease-out;
}
#PopularPosts1 ul li:hover{
background: #eee;
}
#PopularPosts1 ul li:hover:before{
transform: rotate(360deg);  
}
#PopularPosts1 ul li a{
font: 14px Georgia, serif; /* font size of post titles */
text-shadow: 0 -1px 2px #fff;
color: #444;
display:block;
min-height:25px;
text-decoration:none;
text-transform: uppercase;
}
#PopularPosts1 ul li a:hover{
color: #444;
}

Style 2:
blogger gadgets, blogger widgets, popular posts widget
#PopularPosts1 h2{
position:relative;
padding:8px 10px 6px 10px;
width:100%;
margin-bottom: 5px;
font-size:17px;
color:#757575; /* Color of the widget's title */
text-align:left;
}
#PopularPosts1 ul{
list-style:none;
counter-reset:li;
padding:10px;
left:-8px;
width:100%;
}
#PopularPosts1 li{ /* Styles of each element */
width:100%;
position:relative;
left:0;
margin:0 0 1px 12px;
padding:4px 5px;
}
#PopularPosts1 ul li:before{
content: counter(li);
counter-increment: li;
position: absolute;
left: -30px;
top: 50%;
margin-top: -13px;
background: #8E8E8E; /* background color of the numbers */
height: 1.9em;
width: 2em;
line-height: 2em;
text-align: center;
font-weight: bold;
color: #fff;
font-size: 14px;
}
#PopularPosts1 ul li:after{
position: absolute;
content: '';
left: -2px;
margin-top: -.7em;
top: 50%;
width: 0;
height: 0;
border-top: 8px solid transparent;
border-bottom: 8px solid transparent;
border-left:10px solid #8E8E8E; /* background color of the right arrow*/
}
#PopularPosts1 ul li a{
color: #444;
text-decoration: none;  
font-size:15px;
}
#PopularPosts1 ul li {
position: relative;
display: block;
padding: .4em .4em .4em .8em;
*padding: .4em;
margin: .5em 0 .5em 0.4em;
background: #ddd;
transition: all .3s ease-out;
text-decoration:none;
transition: all .1s ease-in-out;
}
#PopularPosts1 ul li:hover{
background: #eee; /* Background color on mouseover */
}  
#PopularPosts1 ul li a:hover{
color:#444; /* Link color on mouseover */
margin-left:3px;
}

Style 3:
blogger gadgets, blogger widgets, popular posts
#PopularPosts1 h2{
position:relative;
right:-2px;
padding:8px 63px 6px 17px;
width:100%;
margin:0;
font-size:16px;
background:#4F4F4F; /* Background color */
color:#f2f2f2; /* Color of the widget's title */
text-align:left;
text-indent:18px;
}
#PopularPosts1 h2:before{
position:absolute;
content:"";
top:36px;
right:0px;
width: 0px;
height: 0px;
border-bottom:12px outset transparent;
border-left:12px solid #000000;
}
#PopularPosts1 h2:after{
position:absolute;
content:"";
top:-6px;
left:-5px;
width: 0px;
height: 0px;
border-bottom:24px outset transparent;
border-top:24px outset transparent;
border-left:24px solid #ffffff; /* Arrow background color on the left */
}
#PopularPosts1 ul{
list-style:none;
counter-reset:li;
padding:10px;
left:-8px;
width:100%;
}
#PopularPosts1 li{
width:100%;
position:relative;
left:0;
margin:7px 0 16px 12px;
padding:10px  4px 0 5px;
}
#PopularPosts1 ul li:before{
content:counter(li);
counter-increment:li;
position:absolute;
top:-2px;
left:-20px;
font-size:35px;
width:20px;
color:#888888;
}

#PopularPosts1 ul li a{
display:block;
font-size:16px; /* Font size of the links */
color: #666; /* Color of the links */
text-decoration:none;
transition: all .1s ease-in-out;font-weight: bold;
}
#PopularPosts1 ul li a:hover{
color:#3366FF;
margin-left:3px;
}

Style 4:
blogger gadgets, blogger widgets
#PopularPosts1 h2{
padding:8px 10px 3px 0;
width:100%;
margin:0;
font-size:16px;
position:relative;
left:-20px;
display:block;
border-bottom:2px solid #ccc;
}
#PopularPosts1 ul{
list-style:none;
counter-reset:li;
padding:10px;
width:100%;
}
#PopularPosts1 li{ /* Styles of each element */
width:100%;
position:relative;
left:0;
margin:0 0 6px 10px;
padding:4px 5px;
}
#PopularPosts1 ul li:before{ /* Style of the numbers */
content:counter(li);
counter-increment:li;
position:absolute;
top:3px;
left:-39px;
font-size:21px;
width:28px;
height:28px;
border-radius: 50%;
color:#777; /* Text color */
border: 2px solid #ddd; /* Rounded border color */
padding:0;
text-indent:9px;
}
#PopularPosts1 ul li a{
display:block;
position:relative;
left:-45px;
width:100%;
margin:0;
min-height:28px;
padding: 5px 3px 3px 39px;
color:#333; /* color of the links */
text-decoration:none;
font-size:14px; /* Font size of the links */
font-style: italic;

}
#PopularPosts1 ul li a:hover{
color:#3366ff;
margin-left:3px;
}

Final Notes

All the CSS is valid. I just have to mention that the numbering is not visible in Internet Explorer 7, since that version of the browser does not support properties that make the numbers appear. For example in the 4th style, the circles look squared in IE8 and earlier versions since, these versions do not support a property that makes them look as circles.
Read more ...

Making a gadget visible only to the blog administrator

And the post title says it all. There are gadgets that sometimes we want to be visible only to us and not to our blog readers, perhaps a Survey already ended that we want to keep, a counter, or any gadget that while we customize, we don't want anyone else to see until the final result is ready.
 The procedure is simple, we just have to add two lines to our gadget that we want to hide.

First thing to do is to go to Template > Edit HTML and then search for the gadget's code we want to hide. It will be easier using the CTRL + F keys and locating the name of the gadget/widget.

For example, in a HTML/Javascript gadget, we will see a code like this:
<b:widget id='HTML1' locked='false' title='' type='HTML'>
<b:includable id='main'>
<span class='item-control blog-admin'>
<!-- only display title if it's non-empty -->
<b:if cond='data:title != &quot;&quot;'>
<h2 class='title'><data:title/></h2>
</b:if>
<div class='widget-content'>
<data:content/>
</div>

<b:include name='quickedit'/>
</span>
</b:includable>
</b:widget>
All you have to do is add the parts in red and ready. If you close the session go to your blog you'll not be able to view the gadget that you have hidden, but as soon as you sign in you will see that it is visible to you.
Not all gadgets have the same structure like in my example, but it will be easier to guide you, just place the first code in red just after <b:includable id='main'>

And the second red code just before </b:includable>
Note: to look inside the widget's code, click on the sideways arrow next to the widget's id.

And with that the gadget will be hidden for readers except you.
Read more ...

Expandable Recent Comments Widget for Blogger/Blogspot

This Expandable Recent Comments is a very accessible widget that can be collapsed or expanded through user interaction, so that now, we don't have to click on the commenter or post title link in order to see the content of a comment.
recent comments widget, blogger gadgets, blogspot tricks

The expanding content can be shown or hidden by clicking on the plus/minus icon or by pressing the "Show all" or "Hide all" button at run time.
How To Add The Expandable Recent Comments Widget to Blogger

Step 1. Log in to your Blogger dashboard and go to Layout > Click on "Add a Gadget" link


Step 2. From the pop-up window, scroll down and click on the HTML/JavaScript widget


Step 3. Copy and paste this code inside the empty box:
<style type="text/css" media="screen">
.row-aa {        background: #f2f2f3; }
.row-bb {        background: #F8F5F1; }
.row-div { 
  margin:0px;
  padding:5px;
}
.comment-header {
  font-size:0.9em;
//  border:1px solid #E0E0E0;
//  background-color:#F3F3F3;
  padding:4px;
  margin-top:10px;
  margin-bottom:5px;
}
.comment-box {
  margin:0px;
  padding:0px;
  font-size:0.9em;
  height:500px;
  overflow:auto;
}
.comments1  { 
//  background: #F3F3F3;
  padding:3px;
  border-left:1px dashed #A6A6A6;
  color: #888888;
  font-style: italic;
  padding-top:4px;
  margin-bottom:5px;
}
.comment-footer {
  text-align:center;
  font-size:0.9em;
  padding:4px;
  margin-top:5px; 
}
</style>

<div style="text-align: center" class="comment-header"><input class="comment-button" id="commshowall" type="button" onclick="if (this.value == &#39;Show all&#39;) { unfold_all(this); this.value=&#39;Hide all&#39;; } else { fold_all(this); this.value=&#39;Show all&#39;; }" style="width:8em;font-size:1em;font-family:Verdana,sans" value="Show all" /></div>

<div class="comment-box">
<script type="text/javascript" src="http://helplogger.googlecode.com/svn/trunk/expandable-recent-comments.js"></script>
<script type="text/javascript"  src="http://helplogger.blogspot.com/feeds/posts/default?start-index=1&max-results=999999&alt=json-in-script&callback=showrecentposts">
</script>
<script type="text/javascript"  src="http://helplogger.blogspot.com/feeds/comments/default?start-index=1&max-results=999999&alt=json-in-script&callback=showrecentcomments">
</script>

</div>

Note: Replace http://helplogger.blogspot.com with your blog/site address.

Step 4. Save your widget and you're done!

Enjoy :)
Read more ...

How To Add A Tabbed Navigation Widget to Blogger

 
The tabviews are elements that allow us to group in a single container various gadgets and these can be selected via tabs.
Its main function is to save space on the blog to avoid scattered gadgets in the same category so you can group multiple gadgets into one. There are several methods for creating tabviews, some require jQuery, other MooTools, or any other script.
To add this widget to your blog, just follow the steps below:

Step 1. From your Blogger Dashboard, go to Template and click on the Edit HTML button

Step 2. Expand the style of the template, by clicking on the sideways arrow before <b:skin> ... </b:skin>


Step 3. Search using CTRL + F for the following tag:

]]></b:skin>


Step 4. Just above it, add the following code:

/* Tabview for Blogger
----------------------------------------------- */
.tabviewcont{
margin:15px 0;
padding:0;
clear:both;
}

.tabviewnav {
margin: 0 0 0 14px;
padding:3px 0; /* If you are using a Blogger Template change 0 with 15px */
font-size:12px; /* Font size of text inside tabs */
font-weight:bold;
}
.tabviewnav li {
list-style:none;
margin:0;
display:inline;
}
.tabviewnav li a {
padding:3px 6px;
margin-right:1px;
background:#F6F6F6; /* The background color of the tabs */
border-radius:5px 5px 0 0;
-moz-border-radius:5px 5px 0 0;
-webkit-border-radius:5px 5px 0 0;
text-decoration:none;
color:#222222;
}
.tabviewnav li a:hover {
color:#222222;
background:#EBEBEB; /* Background color of the tab on mouseover */
text-decoration:none;
}
.tabviewnav li.tabviewactive a,
.tabviewnav li.tabviewactive a:hover {
background:#EBEBEB; /* Background color of the active tab */
color:#222222;
}
.tabviewcont .tabviewtab {
padding:5px;
border:1px solid #EEEEEE; /* Border around the container */
background:#fff; /* The background color of the gadget */
}
.tabviewcont .tabviewtab h2,
.tabviewcont .tabviewtabhide {
display:none;
}
.tabviewtab .widget-content ul{
list-style:none;
margin:0 0 10px 0;
padding:0;
}
.tabviewtab .widget-content li {
border-bottom:1px solid #ccc;
margin:0 5px;
padding:2px 0 5px 0;
}

Step 5. Find the </head> tag and just above it, paste this script:

<script type='text/javascript'>
// Tabview for grouping gadgets

//<![CDATA[
document.write('<style type="text/css">.tabview{display:none;}<\/style>');function tabviewObj(argsObj){var arg;this.div=null;this.classMain="tabview";this.classMainLive="tabviewcont";this.classTab="tabviewtab";this.classTabDefault="tabviewtabdefault";this.classNav="tabviewnav";this.classTabHide="tabviewtabhide";this.classNavActive="tabviewactive";this.titleElements=['h2','h3','h4','h5','h6'];this.titleElementsStripHTML=true;this.removeTitle=true;this.addLinkId=false;this.linkIdFormat='<tabviewid>nav<tabnumberone>';for(arg in argsObj){this[arg]=argsObj[arg]}this.REclassMain=new RegExp('\\b'+this.classMain+'\\b','gi');this.REclassMainLive=new RegExp('\\b'+this.classMainLive+'\\b','gi');this.REclassTab=new RegExp('\\b'+this.classTab+'\\b','gi');this.REclassTabDefault=new RegExp('\\b'+this.classTabDefault+'\\b','gi');this.REclassTabHide=new RegExp('\\b'+this.classTabHide+'\\b','gi');this.tabs=new Array();if(this.div){this.init(this.div);this.div=null}}tabviewObj.prototype.init=function(e){var childNodes,i,i2,t,defaultTab=0,DOM_ul,DOM_li,DOM_a,aId,headingElement;if(!document.getElementsByTagName){return false}if(e.id){this.id=e.id}this.tabs.length=0;childNodes=e.childNodes;for(i=0;i<childNodes.length;i++){if(childNodes[i].className&&childNodes[i].className.match(this.REclassTab)){t=new Object();t.div=childNodes[i];this.tabs[this.tabs.length]=t;if(childNodes[i].className.match(this.REclassTabDefault)){defaultTab=this.tabs.length-1}}}DOM_ul=document.createElement("ul");DOM_ul.className=this.classNav;for(i=0;i<this.tabs.length;i++){t=this.tabs[i];t.headingText=t.div.title;if(this.removeTitle){t.div.title=''}if(!t.headingText){for(i2=0;i2<this.titleElements.length;i2++){headingElement=t.div.getElementsByTagName(this.titleElements[i2])[0];if(headingElement){t.headingText=headingElement.innerHTML;if(this.titleElementsStripHTML){t.headingText.replace(/<br>/gi," ");t.headingText=t.headingText.replace(/<[^>]+>/g,"")}break}}}if(!t.headingText){t.headingText=i+1}DOM_li=document.createElement("li");t.li=DOM_li;DOM_a=document.createElement("a");DOM_a.appendChild(document.createTextNode(t.headingText));DOM_a.href="javascript:void(null);";DOM_a.title=t.headingText;DOM_a.onclick=this.navClick;DOM_a.tabview=this;DOM_a.tabviewIndex=i;if(this.addLinkId&&this.linkIdFormat){aId=this.linkIdFormat;aId=aId.replace(/<tabviewid>/gi,this.id);aId=aId.replace(/<tabnumberzero>/gi,i);aId=aId.replace(/<tabnumberone>/gi,i+1);aId=aId.replace(/<tabtitle>/gi,t.headingText.replace(/[^a-zA-Z0-9\-]/gi,''));DOM_a.id=aId}DOM_li.appendChild(DOM_a);DOM_ul.appendChild(DOM_li)}e.insertBefore(DOM_ul,e.firstChild);e.className=e.className.replace(this.REclassMain,this.classMainLive);this.tabShow(defaultTab);if(typeof this.onLoad=='function'){this.onLoad({tabview:this})}return this};tabviewObj.prototype.navClick=function(event){var rVal,a,self,tabviewIndex,onClickArgs;a=this;if(!a.tabview){return false}self=a.tabview;tabviewIndex=a.tabviewIndex;a.blur();if(typeof self.onClick=='function'){onClickArgs={'tabview':self,'index':tabviewIndex,'event':event};if(!event){onClickArgs.event=window.event}rVal=self.onClick(onClickArgs);if(rVal===false){return false}}self.tabShow(tabviewIndex);return false};tabviewObj.prototype.tabHideAll=function(){var i;for(i=0;i<this.tabs.length;i++){this.tabHide(i)}};tabviewObj.prototype.tabHide=function(tabviewIndex){var div;if(!this.tabs[tabviewIndex]){return false}div=this.tabs[tabviewIndex].div;if(!div.className.match(this.REclassTabHide)){div.className+=' '+this.classTabHide}this.navClearActive(tabviewIndex);return this};tabviewObj.prototype.tabShow=function(tabviewIndex){var div;if(!this.tabs[tabviewIndex]){return false}this.tabHideAll();div=this.tabs[tabviewIndex].div;div.className=div.className.replace(this.REclassTabHide,'');this.navSetActive(tabviewIndex);if(typeof this.onTabDisplay=='function'){this.onTabDisplay({'tabview':this,'index':tabviewIndex})}return this};tabviewObj.prototype.navSetActive=function(tabviewIndex){this.tabs[tabviewIndex].li.className=this.classNavActive;return this};tabviewObj.prototype.navClearActive=function(tabviewIndex){this.tabs[tabviewIndex].li.className='';return this};function tabviewAutomatic(tabviewArgs){var tempObj,divs,i;if(!tabviewArgs){tabviewArgs={}}tempObj=new tabviewObj(tabviewArgs);divs=document.getElementsByTagName("div");for(i=0;i<divs.length;i++){if(divs[i].className&&divs[i].className.match(tempObj.REclassMain)){tabviewArgs.div=divs[i];divs[i].tabview=new tabviewObj(tabviewArgs)}}return this}function tabviewAutomaticOnLoad(tabviewArgs){var oldOnLoad;if(!tabviewArgs){tabviewArgs={}}oldOnLoad=window.onload;if(typeof window.onload!='function'){window.onload=function(){tabviewAutomatic(tabviewArgs)}}else{window.onload=function(){oldOnLoad();tabviewAutomatic(tabviewArgs)}}}if(typeof tabviewOptions=='undefined'){tabviewAutomaticOnLoad()}else{if(!tabviewOptions['manualStartup']){tabviewAutomaticOnLoad(tabviewOptions)}}
//]]>
</script>

Step 6. Finally, look for this line:

<div class='column-right-inner'>

Or if you use an old template of Blogger, search this line:

<div id='sidebar-wrapper'>

Step 7. Paste below one of these two lines, this code:

<div class='tabview'>
<b:section class='tabviewtab' id='Tab1' maxwidgets='1'/>
<b:section class='tabviewtab' id='Tab2' maxwidgets='1'/>
<b:section class='tabviewtab' id='Tab3' maxwidgets='1'/>
</div>

Step 8. Save changes, and go to Layout and there you will see the new areas to add gadgets.


You just have to click on Add a Gadget to add the gadget to the tab that corresponds, or drag a gadget you already have to that section.

If you want to add more tabs, then just add before the last </div> a line like this:

<b:section class='tabviewtab' id='Tab4' maxwidgets='1'/>

Note that each line you add should have a different ID, for example Tab5, Tab6, etc..

You can add multiple tabs, just repeat the last step and likewise remember to change the name of the IDs.

Remember that if your sidebar is too narrow, then you should not put a lot of tabs, or tab titles that are very long.
You should also note that this gadget does not speed up the loading speed of the blog, is only to group gadgets into one, even, depending on the blog-may take a while to load the tabview.
Read more ...

New Blogger Widget: Contact form - Change Style & Install in a Static Page

 
Just a few days ago, Blogger introduced a new widget. It is about a contact form that you can add to your blog easily. It is very basic, because - at least for now, does not permit incorporating files or send anything other than plain text.

The contact form for Blogger has the following features:
  • Field for the user name
  • Field for email
  • Field for the message (textarea)
  • Submit Button
Screenshot
contact form, blogger gadgets, static page
 The design is simple and the text colors inherit the section where you add it. At the moment, this widget has no configuration options and is not available for dynamic views.

How to Add Contact Form to Blogger

To add it to your blog, just select the Layout tab, then click on Add a gadget in the section you want to show, for example, in the sidebar. Then, select the More gadgets tab and add the Contact Form gadget.


blogger gadgets, blogger widgets, contact form

Styling Contact Form


As the background is transparent, the form will integrate well, aesthetically speaking, but nevertheless it is easy to modify using Style Sheets (CSS) to the appropriate selectors. Here's an example:

/* Contact Form Container */
.contact-form-widget {
width: 500px;
max-width: 100%;
margin: 0 auto;
padding: 10px;
background: #F8F8F8;
color: #000;
border: 1px solid #C1C1C1;
box-shadow: 0 1px 4px rgba(0, 0, 0, 0.25);
border-radius: 10px;
}

/* Fields and submit button */
.contact-form-name, .contact-form-email, .contact-form-email-message {
width: 100%;
max-width: 100%;
margin-bottom: 10px;
}

/* Submit button style */
.contact-form-button-submit {
border-color: #C1C1C1;
background: #E3E3E3;
color: #585858;
width: 20%;
max-width: 20%;
margin-bottom: 10px;
}

/* Submit button on mouseover */
.contact-form-button-submit:hover{
background: #4C8EF9;
color: #ffffff;
border: 1px solid #FAFAFA;
}

This is how it will look like after applying the style:
contact form, blogger gadgets, contact form for blogger

To add this style, go to Template > Edit HTML, click on the sideways arrow next to <b:skin>...</b:skin> and paste the code just above ]]></b:skin> (press CTRL + F to find it):


How To Add Contact Form In A Static Page


First step is to add the Contact Form gadget (Layout) and second, to edit the template (Template > Edit HTML) to remove most of the gadget. You have to search for the id "ContactForm", expand the widget by clicking on the black arrow on the left (same with the includable) and then delete the part that I have colored in red (see below):

Part to be removed:

  <b:widget id='ContactForm1' locked='false' title='Contact Form' type='ContactForm'>
    <b:includable id='main'>
  <b:if cond='data:title != &quot;&quot;'>
    <h2 class='title'><data:title/></h2>
  </b:if>
  <div class='contact-form-widget'>
    <div class='form'>
      <form name='contact-form'>
        <p/>
        <data:contactFormNameMsg/>
        <br/>
        <input class='contact-form-name' expr:id='data:widget.instanceId + &quot;_contact-form-name&quot;' name='name' size='30' type='text' value=''/>
        <p/>
        <data:contactFormEmailMsg/> <span style='font-weight: bolder;'>*</span>
        <br/>
        <input class='contact-form-email' expr:id='data:widget.instanceId + &quot;_contact-form-email&quot;' name='email' size='30' type='text' value=''/>
        <p/>
        <data:contactFormMessageMsg/> <span style='font-weight: bolder;'>*</span>
        <br/>
        <textarea class='contact-form-email-message' cols='25' expr:id='data:widget.instanceId + &quot;_contact-form-email-message&quot;' name='email-message' rows='5'/>
        <p/>
        <input class='contact-form-button contact-form-button-submit' expr:id='data:widget.instanceId + &quot;_contact-form-submit&quot;' expr:value='data:contactFormSendMsg' type='button'/>
        <p/>
        <div style='text-align: center; max-width: 222px; width: 100%'>
          <p class='contact-form-error-message' expr:id='data:widget.instanceId + &quot;_contact-form-error-message&quot;'/>
          <p class='contact-form-success-message' expr:id='data:widget.instanceId + &quot;_contact-form-success-message&quot;'/>
        </div>
      </form>
    </div>
  </div>
  <b:include name='quickedit'/>

</b:includable>
  </b:widget>

After you have saved the template, go to Pages and paste the following code into a new blank page with the title you want:

 <div class='widget ContactForm' id='ContactForm1'>
  <div class='contact-form-widget'>
    <div class='form'>
      <form name='contact-form'>
        <p>Name<p>
        <input class='contact-form-name' id='ContactForm1_contact-form-name' name='name' size='30' type='text' value=''/>
        <p>E-mail *</p>
        <input class='contact-form-email' id='ContactForm1_contact-form-email' name='email' size='30' type='text' value=''/>
        <p>Message *</p>
        <textarea class='contact-form-email-message' cols='25' id='ContactForm1_contact-form-email-message' name='email-message' rows='5'></textarea>
        <input class='contact-form-button contact-form-button-submit' id='ContactForm1_contact-form-submit' type='button' value='Submit'/>
        <p class='contact-form-error-message' id='ContactForm1_contact-form-error-message'></p>
        <p class='contact-form-success-message' id='ContactForm1_contact-form-success-message'></p>
      </form>
    </div>
  </div>
</div>

Messages will be sent to the same email that you have registered in Blogger.

Here's a demo page where you can test it (it is an account that I don't use, so don't expect reply).
That's it! If you have any questions or comments please post below.
Read more ...

Saturday, December 14, 2013

Related Posts Widget with Thumbnails and Summary for Blogger

There are several tutorials quite old which have explained different methods for displaying related posts in Blogger [1] [2] but in this tutorial, I will show you how to implement a very beautiful Related Posts widget that comes along with Thumbnails and Posts Snippets, as well. If you want to add it, follow the next steps below:

How to Add Related Posts Widget with Summary to Blogger

Step 1. From your Blogger Dashboard, go to Template and click on Edit HTML


Step 2. Click anywhere inside the code area and then press CTRL + F to open the Blogger search box

Step 3. Find (CTRL + F) this tag:
</head>
...and paste the following code just above it:
<script type='text/javascript'>
//<![CDATA[
var relatedTitles = new Array();
var relatedUrls = new Array();
var relatedpSummary = new Array();
var relatedThumb = new Array();
var relatedTitlesNum = 0;

var relatedPostsNum = 4; // number of entries to be shown
var relatedmaxnum = 75; // the number of characters of summary
var relatednoimage = "https://blogger.googleusercontent.com/img/b/R29vZ2xl/AVvXsEgSgIZzUj2OMq2FMlBE_1DseuLCDgXPA728l8MqLDfioLVMVN5SZcqnDLn6QlutlOXlViuasb-hAovxBiI3WGJoeus_lfmuH7k_HqJug5nmsietOz_zcOvBIACUn5EwDnShx5XU8kpbe78H/s1600/no_image.jpg"; // default picture for entries with no image

function readpostlabels(json) {
  var entry, postimg, postcontent, cat;
  for (var i = 0; i < json.feed.entry.length; i++) {
    entry = json.feed.entry[i];
    if (i==json.feed.entry.length) { break; }
    relatedTitles[relatedTitlesNum] = entry.title.$t;
    postcontent = "";
    if ("content" in entry) {
      postcontent = entry.content.$t;
    } else if ("summary" in entry) {
      postcontent = entry.summary.$t;
    }
    relatedpSummary[relatedTitlesNum] = removetags(postcontent,relatedmaxnum);
    if ("media$thumbnail" in entry) {
      postimg = entry.media$thumbnail.url;
    } else {
      postimg = relatednoimage;
    }
    relatedThumb[relatedTitlesNum] = postimg;
    for (var k = 0; k < entry.link.length; k++) {
      if (entry.link[k].rel == 'alternate') {
        relatedUrls[relatedTitlesNum] = entry.link[k].href;
        break;
      }
    }
    relatedTitlesNum++;
  }
}
function showrelated() {
  var tmp = new Array(0);
  var tmp2 = new Array(0);
  var tmp3 = new Array(0);
  var tmp4 = new Array(0);
  for(var i = 0; i < relatedUrls.length; i++) {
    if(!contains(tmp, relatedUrls[i])) {
      tmp.length += 1; tmp[tmp.length - 1] = relatedUrls[i];
      tmp2.length += 1; tmp2[tmp2.length - 1] = relatedTitles[i];
      tmp3.length += 1; tmp3[tmp3.length - 1] = relatedpSummary[i];
      tmp4.length += 1; tmp4[tmp4.length - 1] = relatedThumb[i];
    }
  }
  relatedTitles = tmp2; relatedUrls = tmp; relatedpSummary = tmp3; relatedThumb = tmp4;
  for(var i = 0; i < relatedTitles.length; i++){
    var index = Math.floor((relatedTitles.length - 1) * Math.random());
    var tempTitle = relatedTitles[i]; var tempUrls = relatedUrls[i];
    var tempResum = relatedpSummary[i]; var tempImage = relatedThumb[i];
    relatedTitles[i] = relatedTitles[index]; relatedUrls[i] = relatedUrls[index];
    relatedpSummary[i] = relatedpSummary[index]; relatedThumb[i] = relatedThumb[index];
    relatedTitles[index] = tempTitle; relatedUrls[index] = tempUrls;
    relatedpSummary[index] = tempResum; relatedThumb[index] = tempImage;
  }
  var somePosts = 0;
  var r = Math.floor((relatedTitles.length - 1) * Math.random());
  var relsump = r;
  var output;
  var dirURL = document.URL;

  while (somePosts < relatedPostsNum) {
    if (relatedUrls[r] != dirURL) {

      output = "<div class='relatedsumposts'>";
      output += "<a href='" + relatedUrls[r] + "' rel='nofollow'  target='_self' title='" + relatedTitles[r] + "'><img src='" + relatedThumb[r] + "' /></a>";
      output += "<h6><a href='" + relatedUrls[r] + "' target='_self'>" + relatedTitles[r] + "</a></h6>";
      output += "<p>" + relatedpSummary[r] + " ... </p>";
      output += "</div>";
      document.write(output);
     
      somePosts++;
      if (somePosts == relatedPostsNum) { break; }
    }
    if (r < relatedTitles.length - 1) {

      r++;
    } else {
     
      r = 0;
    }

    if(r==relsump) { break; }
  }
}
function removetags(text,length){
  var pSummary = text.split("<");
  for(var i=0;i<pSummary.length;i++){
    if(pSummary[i].indexOf(">")!=-1){
      pSummary[i] = pSummary[i].substring(pSummary[i].indexOf(">")+1,pSummary[i].length);
    }
  }
  pSummary = pSummary.join("");
  pSummary = pSummary.substring(0,length-1);
  return pSummary;
}
function contains(a, e) {
  for(var j = 0; j < a.length; j++) if (a[j]==e) return true;
  return false;
}
//]]>
</script>
Note:  
  • To change the number of posts that are being displayed, modify the value in red (4)
  • To change the number of characters to be shown in posts summary, modify the value in green (75)
  • To change the default pic for posts with no images, add your URL instead of the one marked in blue
... also paste the code below just above the </head> tag:
<style>
.relatedsumposts {
  float: left;
  margin: 0px 5px;
  overflow: hidden;
  text-align: center;
  /* width and height of the related posts area */
  width: 120px;
  height: 210px;
}

.relatedsumposts:hover {
background-color: #F3F3F3; -webkit-border-radius: 10px;
-moz-border-radius: 10px;
border-radius: 10px;
}

.relatedsumposts img:hover {
-khtml-opacity:0.4;
-moz-opacity:0.4;
opacity:0.4;
}

.relatedsumposts a {
  /* link properties */
color: #linkcolor;
  display: inline;
  font-size: 10px;
  line-height: 1;
}
.relatedsumposts img {
  /* thumbnail properties */
margin-top: 2px;
  height: 82px;
  padding: 5px;
  width: 82px;
border: 1px solid #fff;
-webkit-border-radius: 100px;
-moz-border-radius: 100px;
border-radius: 100px;
-webkit-box-shadow: 0 1px 2px rgba(0, 0, 0, .4);
-moz-box-shadow: 0 1px 2px rgba(0, 0, 0, .4);
box-shadow: 0 1px 2px rgba(0, 0, 0, .4);
}
.relatedsumposts h6 {
  /* title properties */
  display: table-cell;
  height: 5em;
  margin: 5px 0 0;
  overflow: hidden;
  padding-bottom: 2px;
  vertical-align: middle;
  width: 130px;
}

.relatedsumposts p {
  /* summary properties */
border-top: 1px dotted #777777;
border-bottom: 1px dotted #777777;
color: #summarycolor;
  font-size: 10px;
  height: 4em;
  line-height: 1;
  margin: 5px 0 0;
  overflow: hidden;
  padding: 5px 0 15px 0;
  text-align: left;
}
</style>
Note:  
  • Modify the values in red to adjust the width (120) and height (210) of the widget area
  • Replace #linkcolor with the hex value of your color to change the color of post titles
  • To change the size of thumbnails, modify the values marked in violet (82)
  • To determine the border roundness, modify the values in orange (100)
  • To change the color of the post snippet, change #summarycolor with color hex value
Step 4. Search (CTRL + F) for the following fragment:
<a expr:href='data:label.url' rel='tag'><data:label.name/></a><b:if cond='data:label.isLast != &quot;true&quot;'>,</b:if>
... and add this code just below it:
<b:if cond='data:blog.pageType == &quot;item&quot;'>
    <script expr:src='&quot;/feeds/posts/default/-/&quot; + data:label.name + &quot;?alt=json-in-script&amp;callback=readpostlabels&amp;max-results=50&quot;' type='text/javascript'/>
  </b:if>
The entire fragment should look like this:
          <b:loop values='data:post.labels' var='label'>
            <a expr:href='data:label.url' rel='tag'><data:label.name/></a><b:if cond='data:label.isLast != &quot;true&quot;'>,</b:if>
<b:if cond='data:blog.pageType == &quot;item&quot;'>
    <script expr:src='&quot;/feeds/posts/default/-/&quot; + data:label.name + &quot;?alt=json-in-script&amp;callback=readpostlabels&amp;max-results=50&quot;' type='text/javascript'/>
  </b:if>

          </b:loop>
Step 5. Find this fragment of code:
</b:includable>
<b:includable id='postQuickEdit' var='post'>
Note: if you can't find it, then search only for the code in red

! Click on the sideways arrow to expand the code, then scroll down until you reach to the highlighted line !

...add just ABOVE it, add the following:
<b:if cond='data:blog.pageType == &quot;item&quot;'>
  <div class='post-footer-line post-footer-line-4'>
    <div id='relatedpostssum'><div style='text-align: left; font-size: 15px; margin-bottom: 10px; font-weight: bold;'>RELATED POSTS</div>
      <script type='text/javascript'>showrelated();</script>
    </div>
    <div style='clear:both;'/>
  </div>
</b:if>
Screenshot

Step 6. Save your Template... and hopefully we're done...

Enjoy!
Read more ...